Friday, May 27, 2011

Harp with Cherubs and Roses

Beautiful!  Check out the latest DTCPUG Project.

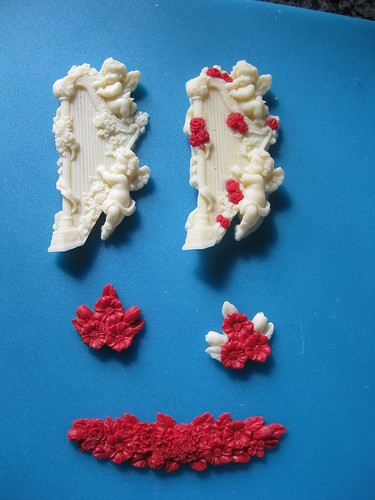
When I saw these molds I thought that the harp looked so like a Michelangelo sculpture, I tried to get that effect by using chocolate and candy melts which are opaque instead of using poured sugar.  The result does in fact look like a statue and would make a great stand alone candy piece, or be lovely atop a wedding cake or valentine. 

To make these candy molds, you can use either candy melts, or almond bark or melting chocolate.  I feel like it is more economical to use almond bark when color is not necessary.   You will also need a decorator piping bag for each color you plan to use.  Depending on the temperature in your kitchen and how fast you work, you may also like to use a heated work surface.  I use a heating pad under a cookie sheet when my candy is setting too quickly.  I also like to work with multiple molds and colors at the same time. If multi-tasking is not your thing, you can plan your layers of color and work one color at a time.  

Put your candy melts or chopped up almond bark into the decorators bags.  Melt in the microwave at 30 second intervals one bag at a time. Be sure to check for hot spots, mash the bags around to mix, and towards the end I often drop down to 15 second intervals to ensure that I don't burn the candy or melt the plastic. Depending on how fast you work and the temperature in your work space you might need to experiment with out long you melt your candy. 


Once the candy is melted, snip the tip of the bag.  For very fine detailed work, go about 1/8th of an inch.  For larger areas, you can go a bit bigger. 


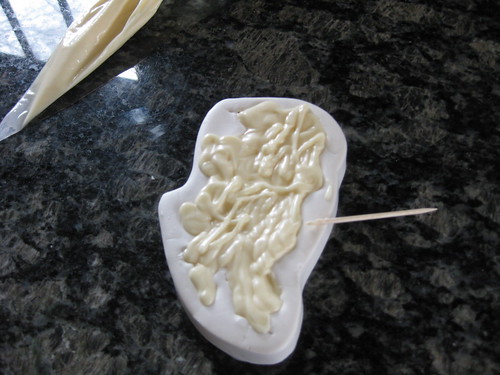
For solid areas of color, you can use the tip of your bag to get down into the details and fill in as you go. The neater you are when you fill now, the less clean up you will have to do at the end.  After you have filled the mold, take a toothpick and use it to stir and smooth the candy and clean up the edges of the mold.  If you have no colored details, you can also use the toothpick to ensure the candy has gotten into all the corners of the mold. 


If you would like to add colored details, you must do that before you fill in the main color.  Here, I piped in the roses and let them set prior to adding the white. 


This particular mold has many fine details, so it was important to have very warm melted candy and a fine tip to get into the little corners.   I sometimes have a hard time seeing what the details will be from reversed image you get looking at just the mold, so before I choose to add color I like to create a solid candy in the mold and look for things like flowers or ribbons that I want to have in color.  If you hate the solid one, you can always re-melt the candy and use it again.  Be careful when you re-melt the candy melts or chocolates.  They do not always melt as slowly the second time, and if you try to re-melt them too many times they do get a bit funky. You can some times get uneven color or spotting or a bit of a frosted white look to your end piece as the repeated melting affects the tempering of chocolate. 

Once the detail colors have set, fill in with your back ground color.  This time as you smooth with your toothpick, be aware that if you stir too deeply you can end up mixing in your contrast color.  This is a nice effect if you are going for marble or swirls, but if you want crisp edges you should avoid poking down too deep. 


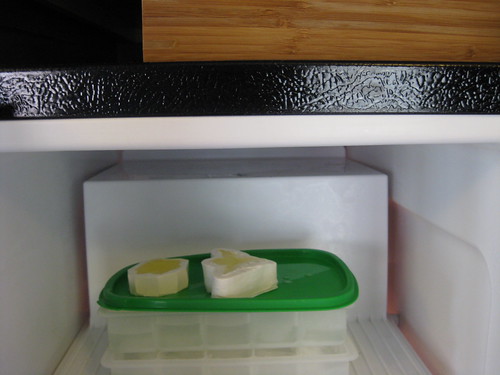
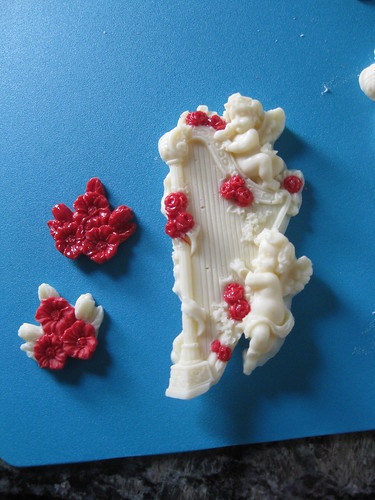
Now, wait for your candy to set. If you are impatient you can put them in the freezer to speed up the process. When I remove the molds, I loosen all around the edges before I pop out the entire piece.  DTC molds are extremely flexible, even out of the freezer. Here is a close up of the harp with red roses. 


If this is a show piece and you really want to make it pop, brushing on a dab of Confectioners Glaze will make your candy very shiny.  I used it on only the roses to add to the contrast.  


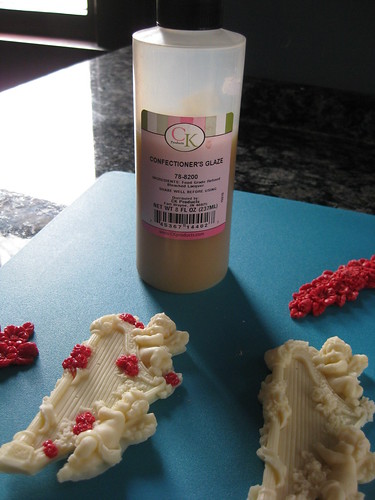
In this image you can see, the solid red flowers are glazed, and the ones with contrasting white buds are not. You can also see how the roses on the harp stand out, making the matte white look more like marble or an ivory statue.  It is a very nice finishing effect. 
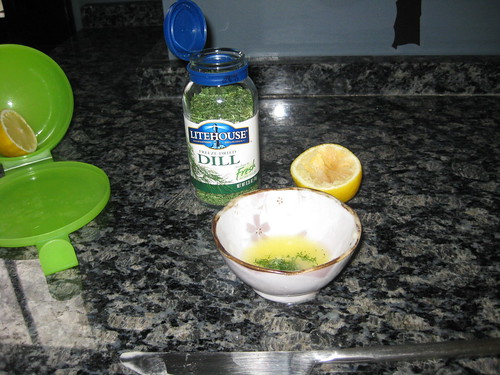


Product Used:

Wednesday, May 25, 2011

Mystery project- Shoe #3 and Carved Rose

Another DTCPUG Project!

These are two beautiful molds that I decided to use with melted candy. The shoe has wonderful detail in the decoration and would look fantastic with any other edible material as well. The carved rose mold is very delicate in the center and I would be afraid it would lose some of its impressive dimension using fondant or gumpaste, but would be amazing in Isomalt (I just ordered my first package of venuance pearls and can't wait to give them a try!)
Supplies I used:
Shoe #3 and Carved Rose silicone molds

White and Pink candy melts

Plastic decorator bags

Pearl and Pink luster/pearl dusts

Paintbrush

Work surface/ silicone mat

There are a few different methods for melting candy and you probably already have your favorite. I have been happy with putting the candy in the plastic bag on a folded paper towel in the microwave for 30-45 second intervals until melted.
I quickly filled the mold and tapped it several times on the counter to release any trapped air bubbles before setting in the freezer. While my white candy was still melted in the plastic bag, I filled the rose mold as well. I think my biggest challenge was time management and trying to get as many pieces done as I could using just the two molds without too many reheats in the microwave. I did read about using a heating pad under the silicone mat in other tutorials, but was happy to find out that the candy set quickly enough in these molds that I was able to get several set before the decorator bag of candy hardened.


After the candy was set, I gently released the mold by pulling it away from the piece working around the edge a little at a time.

I then used a blade to trim off the excess candy for a clean look.


For my particular project, I wanted to use the shoe as a cake topper, so I added two lines of melted candy on the back to adhere toothpicks. While the white was still melted, I filled another shoe mold to make a matching pair.
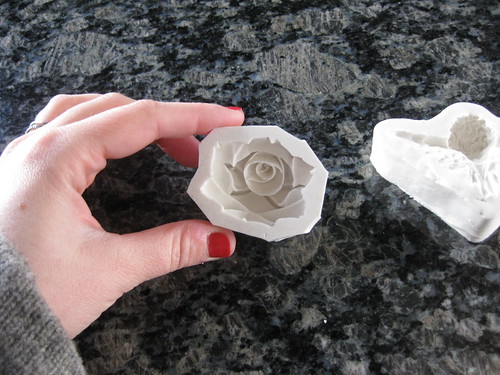
For the rose mold, I made sure to squeeze the candy using the tip of the bag into the tiny crevices. This mold needed a bit more tapping on the counter and had more bubbles, but I was successful at getting them out before placing in the freezer.


Again, I worked carefully to release the candy from the mold. From the sound of it, you would swear it must be ripping the mold, but are pleasantly surprised when it remains intact after releasing the rose.

I loved the detail of the shoe so much, I wanted to see it in pink as well since the pictures didn't really show off the beauty and detail of the white molded shoe.


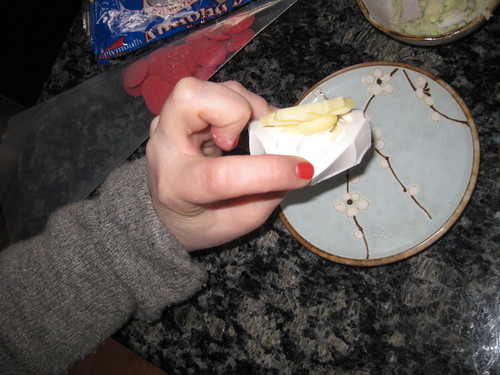
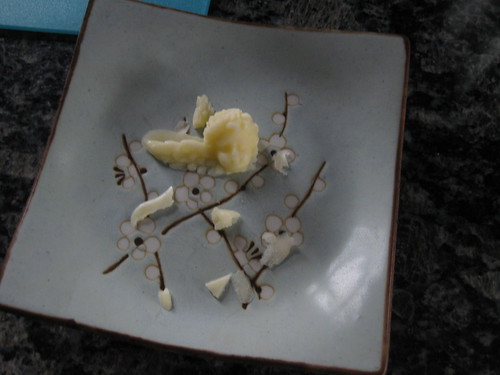
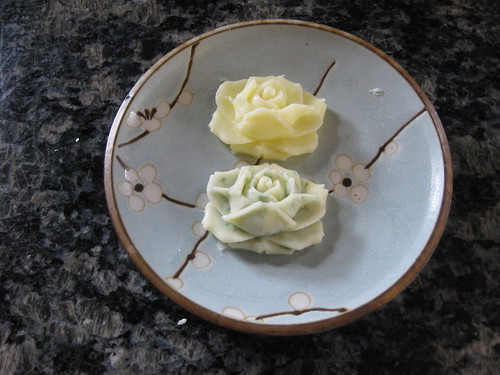
My molded pieces needed for my cake. How about some pearl dust?


I used a dry brush to apply the dust to the candy. You can mix the dust with water, lemon extract or alcohol such as vodka or a clear schnapps for more of a paint, but this worked out great for the look I wanted.


Even happier with the pieces after a little pink to accent the white candy and a little pearl to shine up the pink candy. I placed the white pair on the cake top using the toothpicks and used the roses for a border around the bottom of the cake along with the pink shoe with a dab of buttercream to adhere to the fondant and it was done :)


I enjoyed this project especially since I received a mystery mold that I probably wouldn't have ordered for myself but was very pleased with the outcome :)

Thanks! Sam

DTC Products Used:

Tuesday, May 24, 2011

Jewel molds are so versatile!

Here is the latest DTCPUG Project -

For the tutorial, I have a great selection of DTC jewel molds. While I think these would look great done with isomalt, I wanted to try them with fondant...there have been plenty of how to's with other molds with isomalt, and while beautiful, i wanted to mix it up.
I love a mold that I can use for a bunch of different things – how many of us have drawers fill of molds that we used once and now just take up space? So I am going to use these to make a cake for a boy, cookies for a girl, and cupcakes for a woman’s’ engagement partyDepending on what you want to make, gather together
Fondant in jewel tones, white, yellow and grey
Pearl dust
Gold and/or silver luster dust

First, I tried the molds with some jewel tone fondant. Dust the molds with pearl luster dust, and press enough fondant into each mold to be able to fill level. Then just pop them out…oh look, cute! I like those, so I am going to do another round in white – Tada!


I also have a larger “solitaire” mold and various size smaller solitaries, I am going to do those in white.

I want to make a couple “rings” out of the large stones, so I make one silver and one yellow. Since I am on a roll, I am going to make a couple for the smaller size as well. I prefer to make the gold out of yellow fondant, and the silver out of grey. After these dry, I will paint them with the luster dust mixed with vodka.


I have left these to dry for a couple days, and painted them – now lets put together some fun stuff!

So after painting the rings with luster dust paint, I used sugar glue to attach them to the "stones". The large solitare would look fabulous in a ring box cake, I put it on a 6" here so you get an idea of the size. I was lazy and only painted the top of the ring, don't be like me.
The little rings are on some cupcakes - awwwww, aren't they cute!


Now I am going to try the smaller white stones for some cookies for a girls' princess party - just press them into the icing before it dries - A great way to add a little extra ooomph!


Lastly, I am going to take some of the multi colored jewels, and use them for a boys pirate cake. What a nice quick way to take your cake to the next level


So, there are just a few options for using these molds, and I am sure you can think of more! Definitely a great, multipurpose mold to have on hand.

DTC Products Used:
Jewels - Multi set of 8
3D Diamond 1/5 inch
 

Wednesday, May 18, 2011

Dinosaur Molds

Some of my favorite posts are those for the Kiddo's -- and this one in particular makes me think of my wonderful Niece Chloe and her love for dinosaurs.  She wanted Dino molds, so these were created for her - Plus they make a wonderful addition to the store!  Thank Robin for such a fun and creative project.
 
For my Children's themed project I received 4 adorable dinosaurs. My first thought went straight to the volcano themed cake but I wanted to do something different. I remembered a merry go round kit I received for Christmas and thought how cute it would be to make a prehistoric Merry Go Round cake topper.

Using DTC molds are super easy. In fact as I was working on this project I did it with a broken wrist. Although I wasn't able to put as much detail on the finished project as I would like I was able to make the dinos with one hand proving how easy a DTC mold can be!


To begin you will need your DTC molds, a mat for working on, fondant in various dino colors, and a sharp cutting instrument. For decorating you can use an airbrush, luster dust, ground up chalk, or even cocoa powder.


Start by taking a small amount of fondant and pushing it into the mold.


Push fondant into mold and remove excess around edges and push toward the inside of the mold. For what I was using the dinos for I made sure the back of the mold was level and flat.


If you don't remove excess before un molding your dino will look like this.


You can then use your sharp knife to cut along edges and remove extra fondant.


This is what all four of the dinos look like before I colored them.


For this dino I used cocoa powder. I just took a small amount and brushed it on with a paint brush. I then took a clean brush and removed excess powder so that remaining powder made a shadow effect in the creases.


This dino I highlighted the light green fondant with a darker green airbrush color to give it more dimension.


This dino started out cream color and with a bit of green and dark brown airbrush this was the end result.


This dino began with dark green fondant and I added brown airbrush color.


The three airbrushed dinos


For the topper it is the Wilton Carousel kit. A gift I received for x mas and figured I wouldn't get much use out of it but I think this prehistoric dino go round is perfect for a little boys birthday. Again if I had both hands I would have loved to put more detail on the carousel maybe even some little saddles with stirrups! I attached the dinos with melted chocolate. You could easily make these cute dinos with chcolate.

DTC Products Used:


Butter Roses

LOVE! I really do love to see the multi uses of our products -- and butter molds, how very creative -- You know, I bet you could do the cream cheese mints in the mold too!  Thanks Theresalynn for such a creative post! 

I was pleasantly surprised to find my Mystery Project was several lovely rose molds, a harp, and cupid.  The largest of the rose molds was the perfect size to do something slightly different than your typical Decorate the Cake how to,  molded butter!  Now, to create a lovely butter to accompany a romantic dinner the choice of mold is very important.  Butter is softer and more fragile than candy.  It is brittle when its cold, and very soft at room temperature.  Unlike gum paste or fondant, butter never hardens. It can be a tricky substance to mold, and your selection of a shape or mold to use will make or break your finished product.  To illustrated this very important point, I have included a "what not to do" example along with my how to.

My choice mold for the butter.  Notice, the rose is deep and round, compact and with out too many outlying shapes.

And equally adorable, but ill-suited for a butter application, we have cupid. See how cupids wings are very shallow? Watch what happens to poor Cupid. 


To create the butter mold, the easiest way to get the most details from your mold is to melt your butter. The liquid butter runs into every nook and cranny. You can also use softened butter and spackle it in with a butter knife, but I find that there are many air pockets and you lose details in your finished product. The trick to using melted butter is to be careful to not over-melt the butter. Butter has a high water content, and if over heated the water can evaporate out of the butter and mess up the consistency. I put two pats of butter in the microwave for 30 seconds until it looks like this. 


A few seconds of stirring ensures that it is melted completely and not over melted.  Then pour into your molds and put in the freezer to set for 5 or 10 minutes.  The amount of time it takes to set will depend on how large your mold is and how hot your butter was.  The good news is that you can't over-freeze butter. Frozen butter  comes right back to room temperature beautifully, so when in doubt leave it in 5 minutes more before you fuss with it.  Also, be aware that liquid butter is happy to spill all over your freezer, so take out some insurance by placing the molds on a tray with a lip.  It is easier to keep things level, and to clean up spills. 


Now comes the fun part!  Time to un-mold!  DTC molds are extremely flexible.  I like to pull back all around the edges before I pop out the molded item.  If your butter is set hard enough, and your mold was compact and round, it will come out just like a chocolate or hard candy. 


If your mold had thin feather wings like our friend Cupid, here is what happens. Notice, the wing I over poured came out, but with that ugly extra lip. Cupid's head was deep and round, it looks good.  But that thin little wing was just too brittle and it fell apart, along with the v shaped feathers under his face. There are just some shapes and designs that are not meant to be in butter.  Best to save those to make some chocolates for dessert. 


But look at our lovely rose! 


Now, if plain old butter is too boring for you, get creative!  There are hundreds of delicious herb butter recipes out there. Here are a couple tips for making molded herb butter. 

#1 The smaller the pieces of herbs, the less they will poke out or interrupt the design of your mold. Remember, we are doing this for the beauty of the finished piece in addition to the flavor. 
#2 Just because every recipe on the planet says to use fresh herbs doesn't mean you cant use dry, or even better, freeze dried. Dry herbs tend to be in smaller pieces and mix into liquid butter easier than fresh. Dry herbs also have a tendency to develop their flavor over time, so they are great to use in a butter you plan to serve the next day. 
#3 Experiment with your favorite flavor combinations!  You don't need a recipe. Choose something to go along with whatever recipe you are making for the meal.. Herb Butter is a delicious addition on top of mashed potatoes, steak, fish or chicken as well as breads and rolls. 
#4  If you are using unsalted butter and making a savoury herb butter, be sure to add some salt! 

A few flavor profiles that I really love:  
Garlic Powder and Thyme
Honey and Cinnamon
Cardamom and Curry Powder
Chive and Onion Powder
Ginger (I like to use fresh grated)
Lemon and Dill

Here is how I made the Lemon Dill Butter.  I used freeze dried dill, but dry or fresh would work as well.  Be sure to start with either melted or softened butter to make it easier to mix.  Just a splash of lemon is enough, so start with a little and then adjust for taste.  Remember, butter has a large water content, so it can take liquid ingredients if you mix well and use the right proportions.  Mix, mold, and put in the freezer to set! 


And here are my final roses, ready to sit atop a fresh bun! 


I really enjoy how the dill change the color of the butter, and if you wanted to you could even add some food coloring.  I prefer to have naturally colored foods, so I would most likely use something like a bit of beet juice if I wanted pink roses, or perhaps some blueberry puree if I was going for purple.  Start with just a bit and add more until you get the flavor and color you want. Remember, the more liquid you add the more you soften the consistency of your room temperature butter. 

Stay tuned for part 2 of my Mystery Project, a more traditional molded candy. 
 
DTC Products Used: